
Assets Language Copy
1 Create a Language Folder
In any Asset directory (e.g., /content/dam/lenovo/it-test), create some new folders for the language that needs to be translated. The title and name of the folder must comply with the language naming conventions.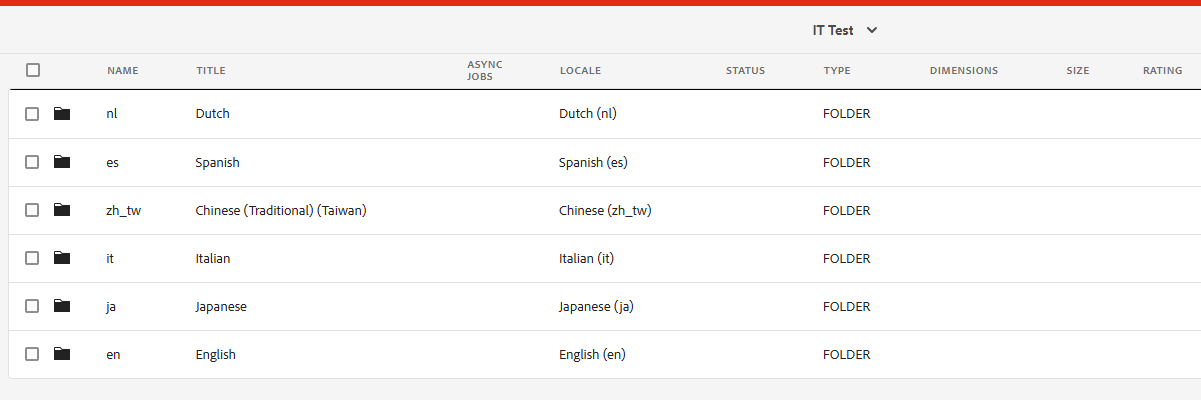
2 Organize Files in the Source Language Folder
Put the files that need to be translated into the Source Language folder. For example, use the English folder as the Source Language.

3 Configure Cloud Configuration
Configure the Cloud Configuration option in the Properties of the Source Language folder and select the correct cloud configuration. For example, select [Lenovo AEM_Translation_LILT].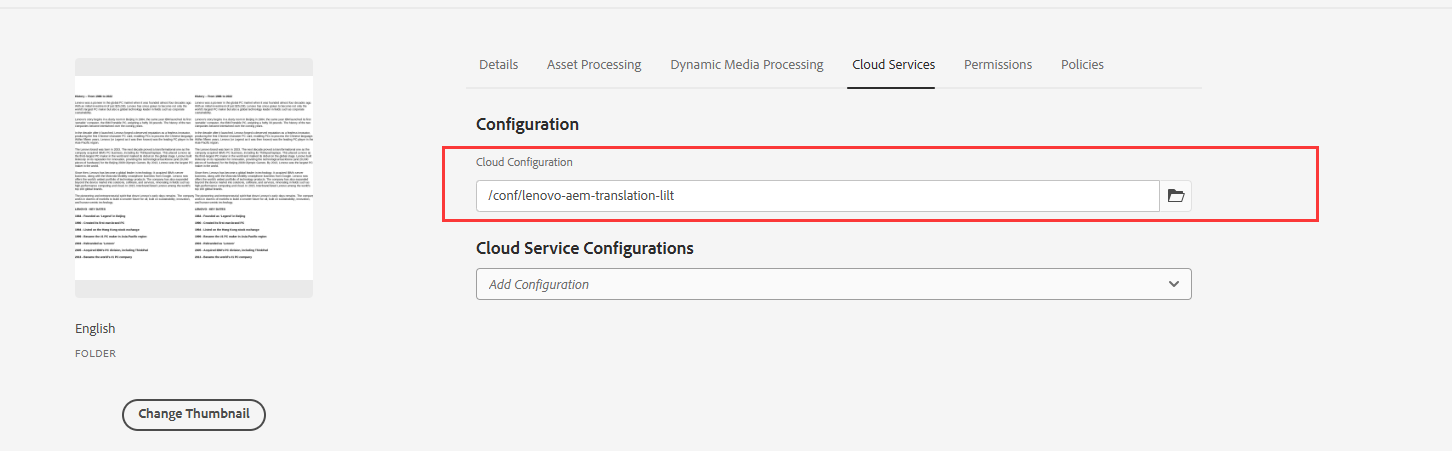
4 Create a Translation Project (Optional)
Manually create a translation project or use an existing translation project, ensuring that the correct source and target languages are configured and that the cloud configuration matches the one configured in step 3.
Note: This step is not required if you choose the Create Translation Project option in Step 5.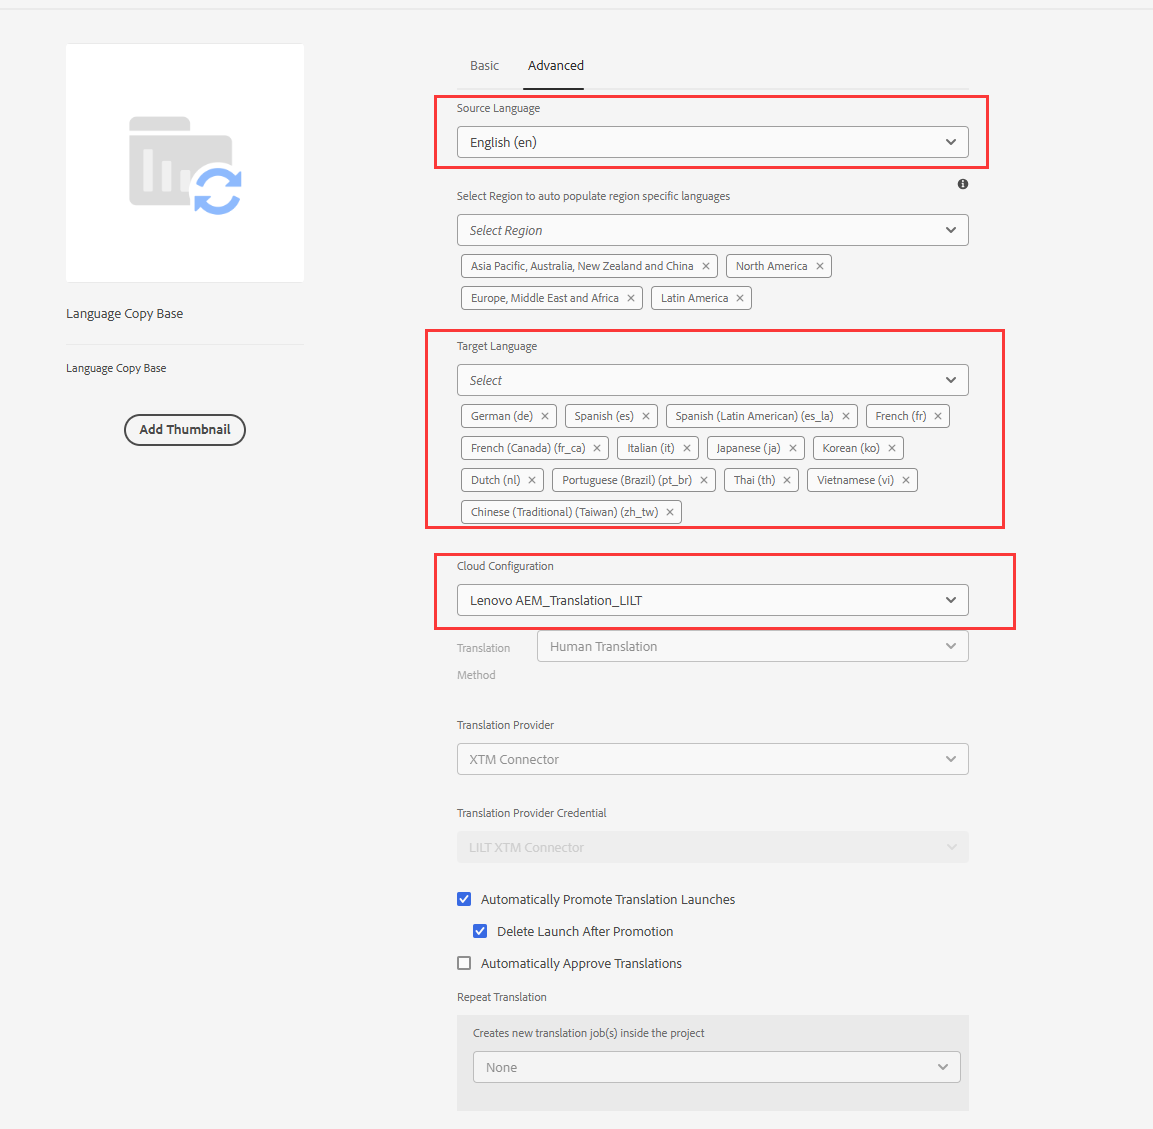
5 Add to Translation Project
Under the path /content/dam/lenovo/it-test.
Note: If you choose to Create Translation Project in this step, clicking Start will automatically create a corresponding Translation Project under Projects.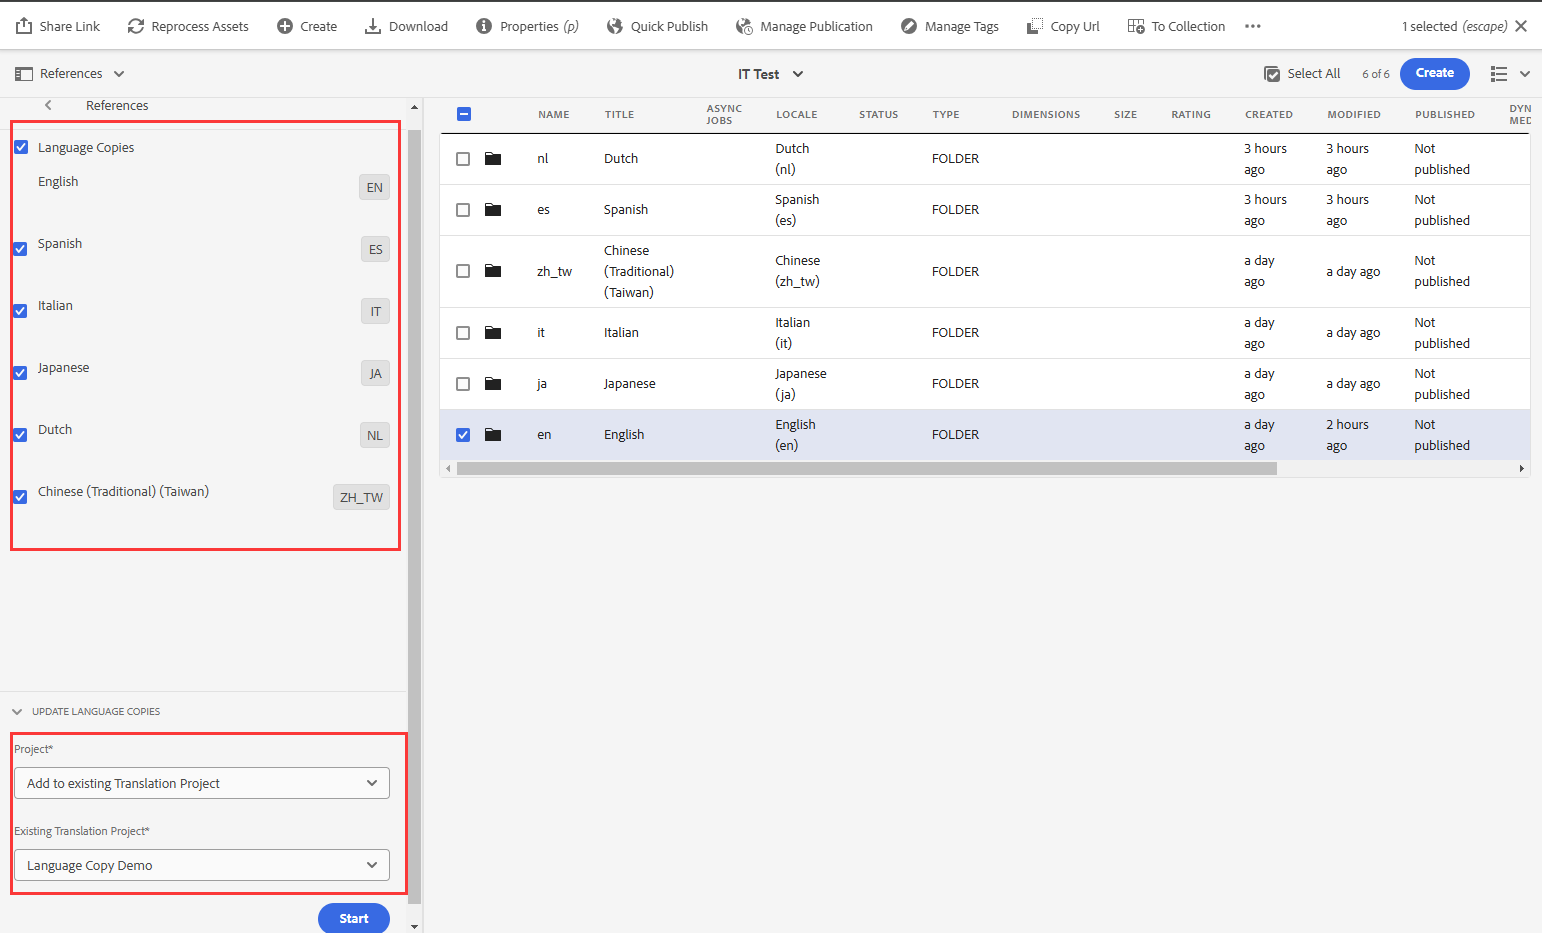
6 Verify Translation Job
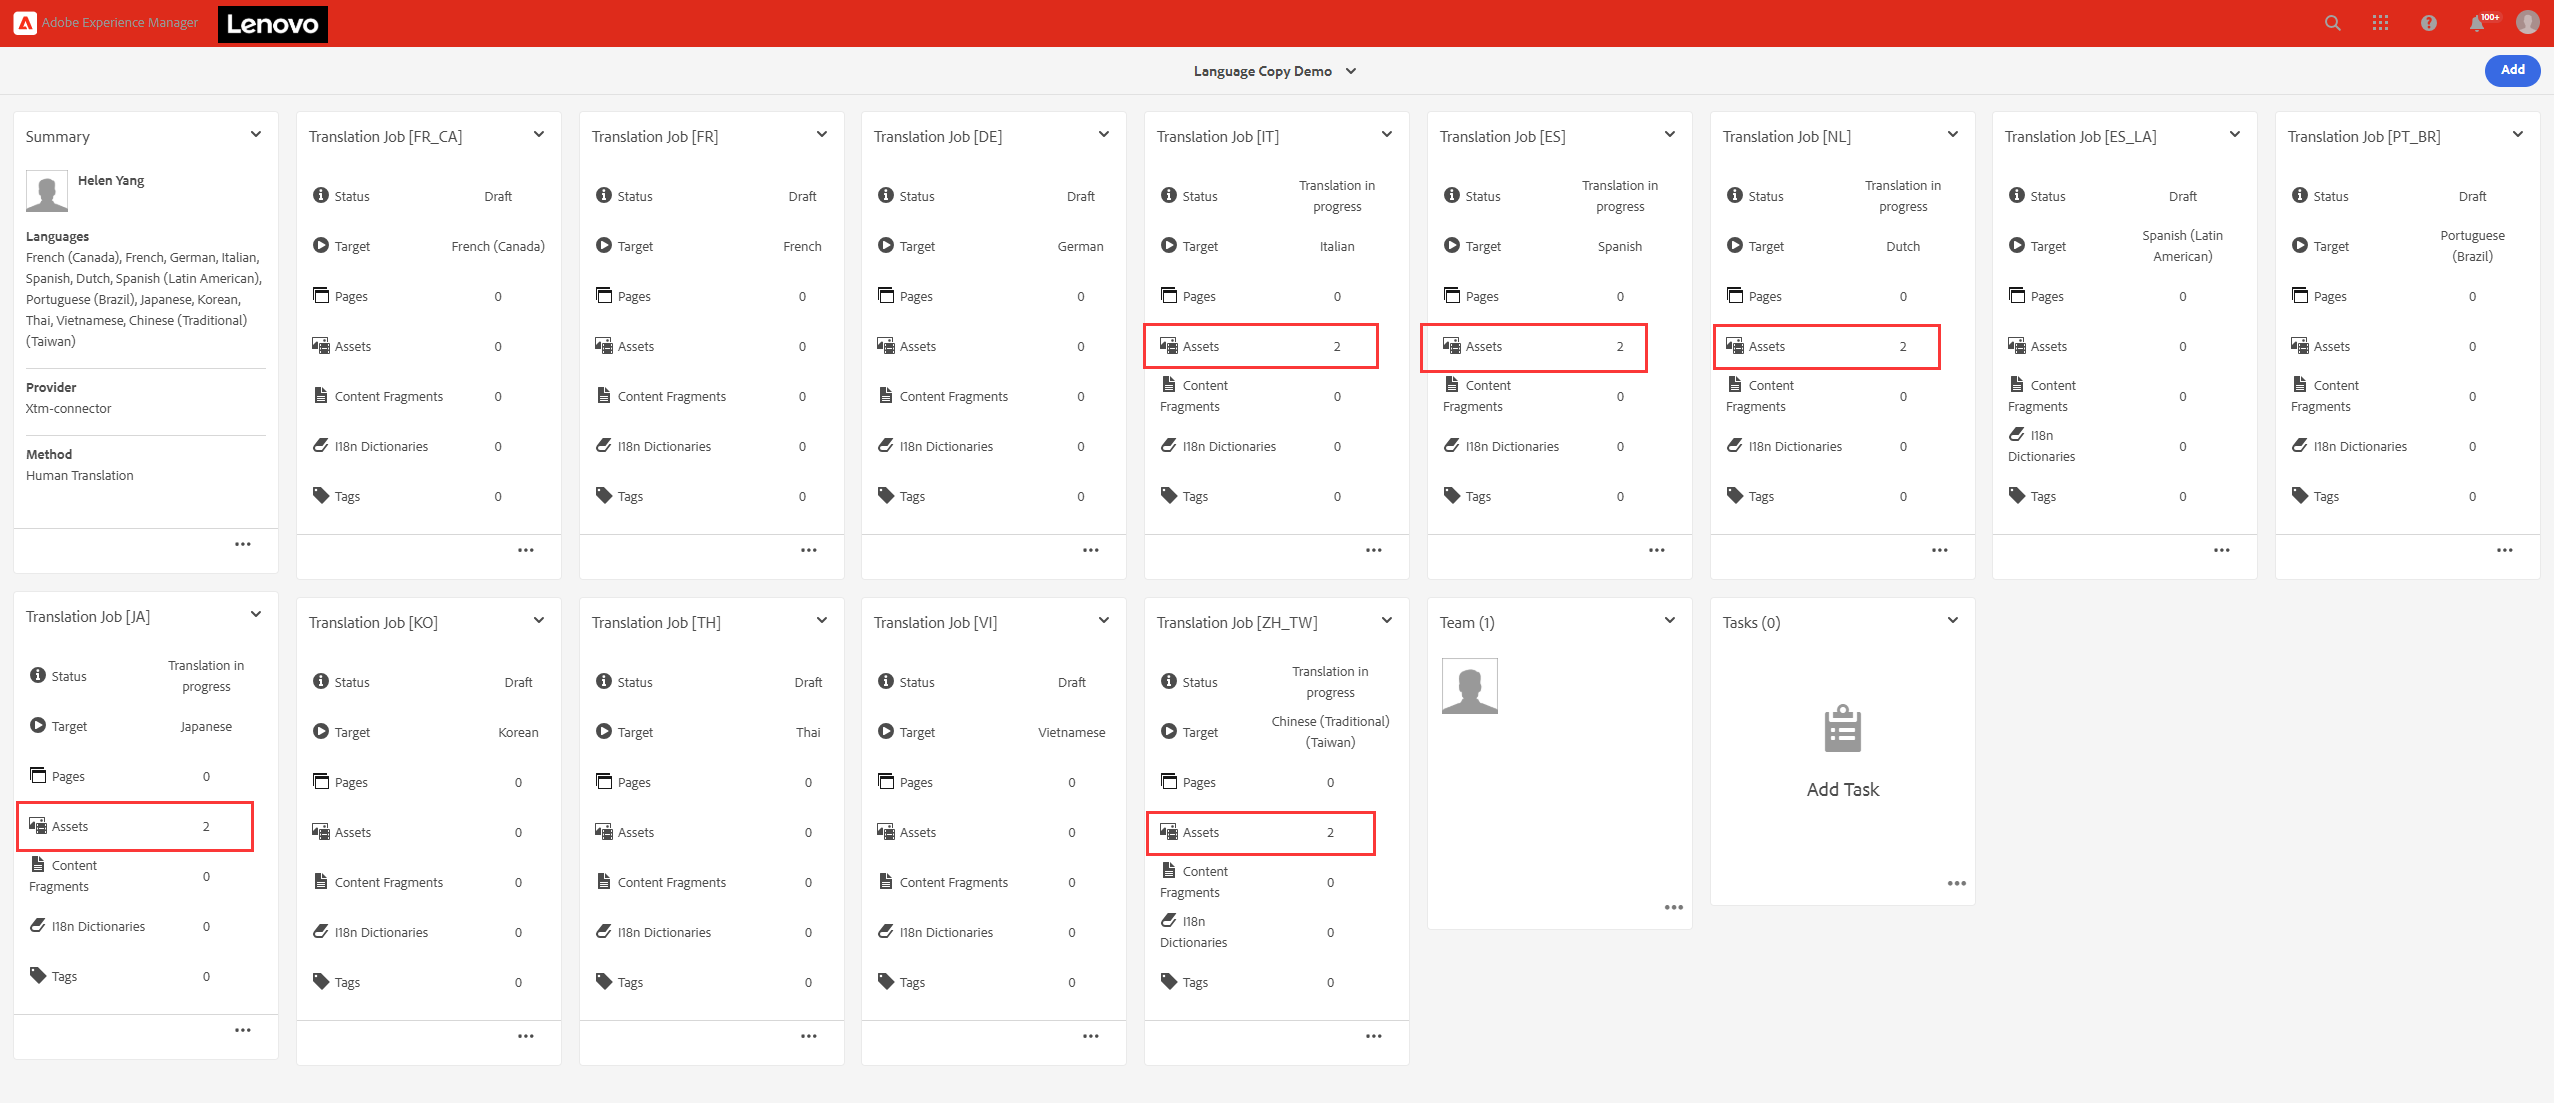
Switch to the Projects View, locate Language Copy Demo, and open it to see that the assets have been added to the corresponding Translation Job for the target language.
Note: If you selected Create Translation Project in Step 5, please check the project automatically created by the system.
7 Related document from Adobe:
https://experienceleague.adobe.com/en/docs/experience-manager-cloud-service/content/assets/admin/translate-assets#add-to-existing-translation-project
上一篇
Adobe考证相关资料